UltraGen in AIPRINTGEN: how one tab prepares your image for a 3D model, a bas-relief and 3D printing
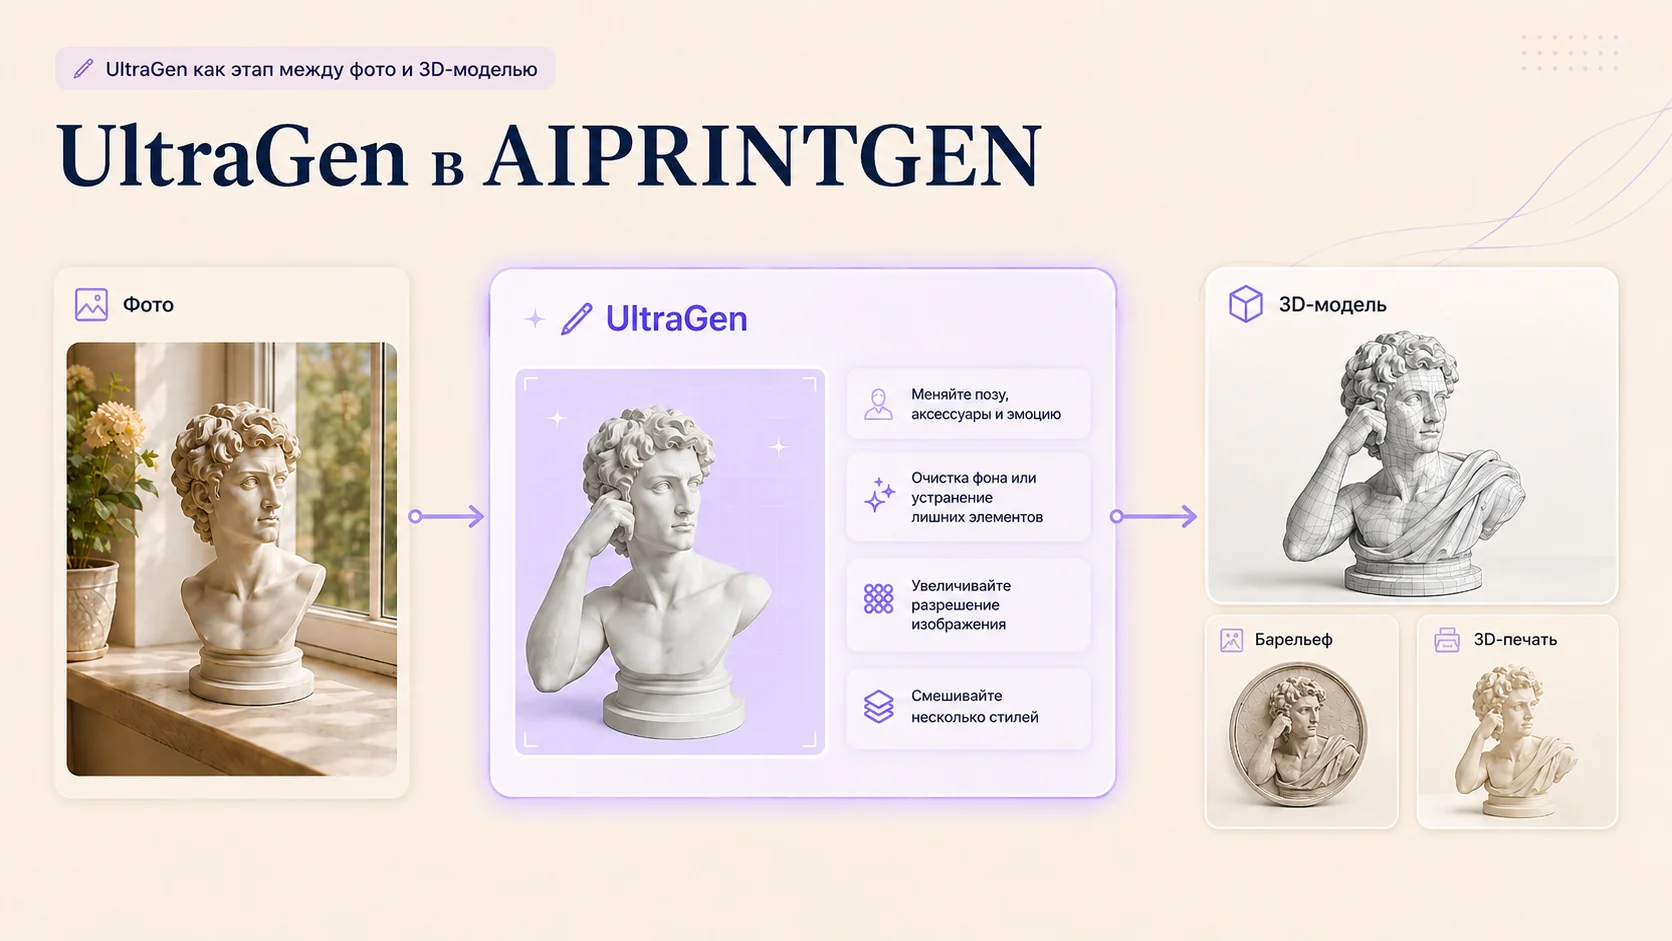
When people talk about AI for 3D models, they usually mean only the final result: getting an STL, a figurine, a bas-relief or a model for a 3D printer. In practice, though, the quality of that result depends heavily on the original 2D reference. That is exactly where the UltraGen tab in AIPRINTGEN comes into its own.
UltraGen is not just an "image generator". It is a working tool that helps you prepare, improve and adapt a 2D image for the 3D model you are about to build. In many scenarios this step is the decisive one: you can remove an unwanted object, clean up the background, make the subject more readable, strengthen detail, get better angles, or even blend styles from several references.
Why 2D generation in UltraGen is already a serious tool
Many users feel that 2D generation is merely a helper before the "real" 3D generation. In fact it is the other way round: a good 2D reference usually saves a lot of time, iterations and credits in the steps that follow.
The UltraGen tab is useful when you need to:
- improve an image before creating a 3D model;
- prepare a source image for a bas-relief;
- remove the background and visual clutter;
- delete an unwanted object from the frame;
- get cleaner, more readable angles;
- blend the styles of two images;
- prepare separate elements, such as a base for a figurine;
- refine the concept before generating the 3D model at all.
That is why UltraGen is better seen not as an "add-on" but as a multi-purpose way to build the visual foundation of your future model.
It is only fair to say the rest, too: UltraGen is not a magic wand. Like any generator it can misread a scene, alter small details or add artefacts. A better result may require a more precise prompt, a better reference or another run.
What UltraGen solves in practice
1. More detail and more usable resolution
One of the most valuable scenarios is preparing images for bas-reliefs. If the source picture is small, noisy or simply too vague in its small forms, the resulting relief can come out flat, muddy or missing important detail. UltraGen can give you a cleaner, better-defined 2D reference that suits the next generation step far better.
This matters especially when you need to strengthen:
- the contours of a face or figure;
- the transitions between light and shadow;
- the readability of decorative elements;
- the depth of the composition.

This is an important scenario for AIPRINTGEN because bas-reliefs depend heavily on the source image. If you are preparing relief geometry for machining, also read "How to Prepare a Bas-Relief STL from a Photo for CNC".
2. Better angles: the four-view dog case
Another strong UltraGen scenario is helping out when you need better angles of an object.
In the dog case the task was to prepare cleaner, more usable images from several sides. For the later generation in the "All sides" tab, the subject has to stay readable, free of obstructions and undistorted by a busy environment.
What UltraGen brings to a case like this:
- it helps focus attention on the subject itself;
- it lets you strip out secondary elements;
- it makes the different angles more consistent with each other;
- it makes the form easier to read during the 3D step.
Starting from a reference image and a clarifying prompt, we regenerate the source shots.
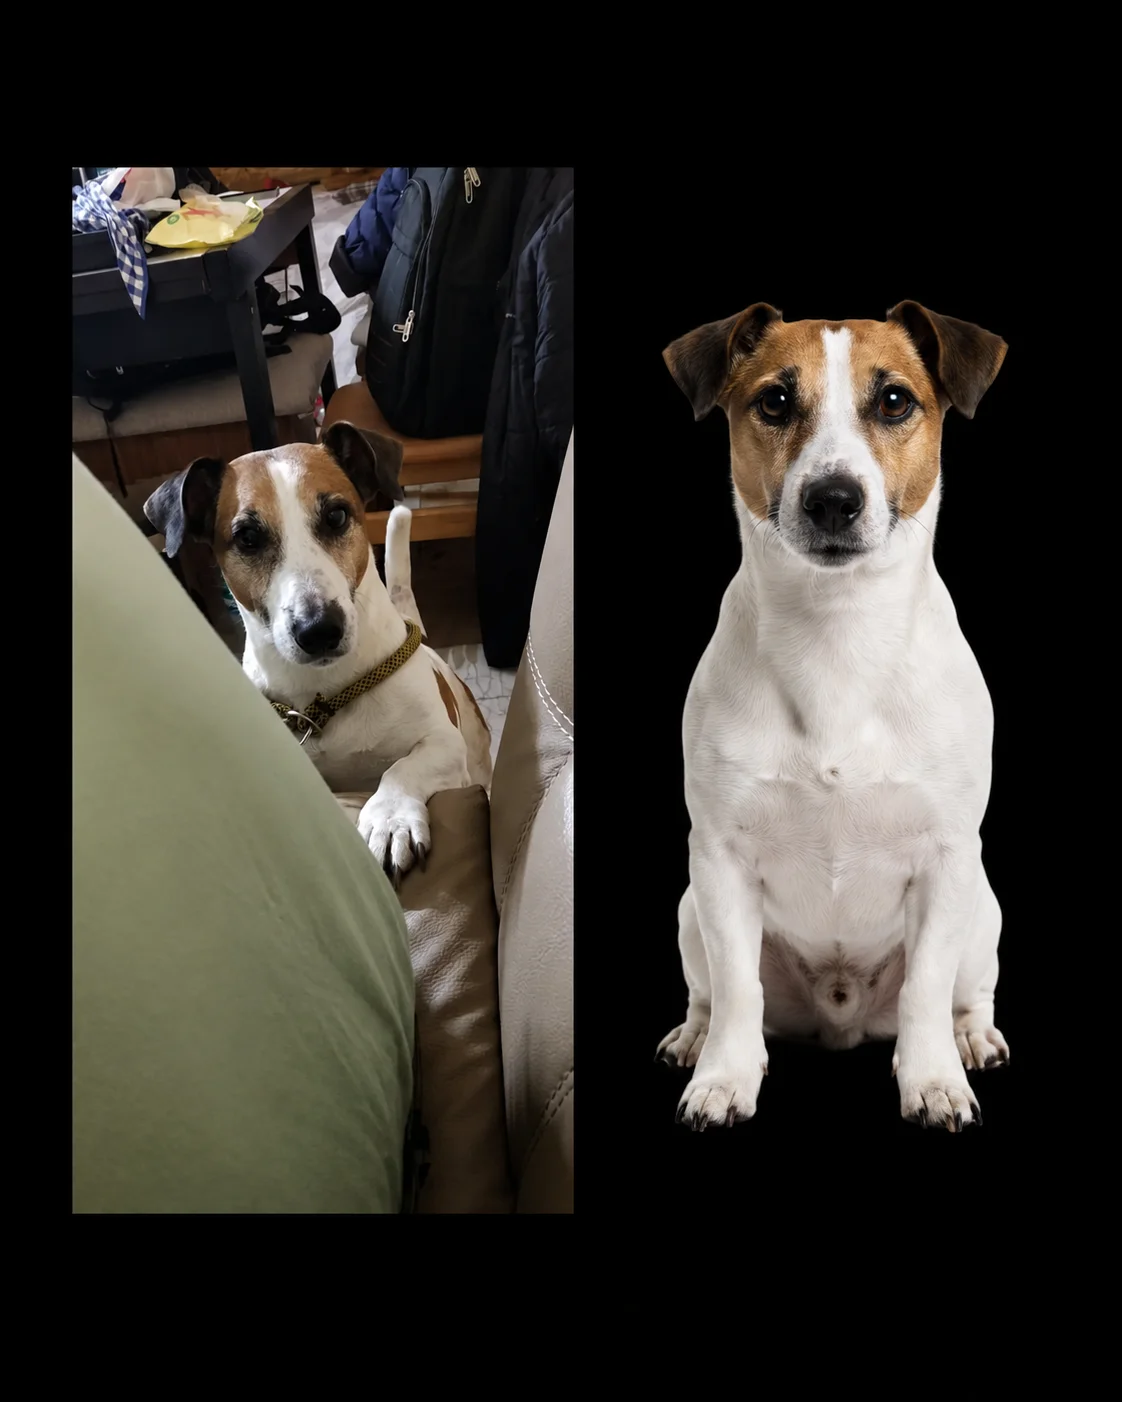


This is particularly useful if you want a figurine of a pet, a souvenir or a printable model from a photo. The more consistent the views are with one another, the better your chances of getting coherent, stable 3D geometry.

3. Removing an unwanted element: the hand-and-keys case
A very common problem with user photos: something in the frame simply should not end up in the model. In this image, for instance, a hand is holding keys — but the goal is a hand without them.
UltraGen suits tasks like this as a tool for cleaning up the scene. You can state a more precise intent: keep the shape of the hand, the pose and the overall view, but take the foreign object out.
Why this matters:
- an unwanted object can distort the 3D model;
- the neural network may read an accessory as part of the composition;
- in printing this often leads to needless protrusions, intersections or an awkward shape.
For tasks like these it pays to phrase the prompt as concretely as possible.

4. Preparing an icon with lettering for a bas-relief
The reference image of the icon carries an inscription that is then reproduced in the bas-relief generator. The point is not simply to get a pretty picture, but to prepare the image so the lettering does not stand in the way of a successful relief.
Here UltraGen helps to:
- bring out the lettering;
- remove background interference;
- strengthen contrast;
- make the composition better suited to being turned into a relief.

In this example UltraGen serves as a preliminary "clean-up" stage for the composition.
5. Generating a base for a figurine
Many users think of a 3D model as the figurine alone, but in practice the finished result often needs a base as well. This is a separate and very practical use for UltraGen.
The task comes down to quickly getting a workable visual concept for the base:
- a round, oval or square base;
- a stylised platform matched to the character;
- a themed base for a specific scene;
- a minimalist platform for a stable print.

This matters especially when the figurine should not merely exist as a model, but look good in print and stand securely once it is made.
6. Blending the styles of two images
UltraGen is also interesting because it handles more than clean-up and deletion: it can blend styles. That helps when you have, for example:
- one photo with the right shape of the object;
- a second one with the style, texture or mood you want.
This lets you combine:
- a realistic shape with a decorative style;
- one pose with another surface treatment;
- the overall look with individual visual features.

If the result from two references is not quite right, add a clarifying prompt: what to keep from the first image and what to take from the second. This approach gives you a more controllable result and is especially useful for figurines, souvenirs and decorative models.
7. Removing the background is best done while generating the 2D reference
One of the most underrated tips: if you already know you will not need the background, say so right away in the UltraGen task.
A clean background helps in almost every scenario:
- preparing an image for a 3D model;
- figurines from photos;
- STL from an image;
- bas-reliefs;
- catalogue images of objects.
Removing the background up front, rather than trying to fix it after a disappointing generation, usually gives a noticeably cleaner result.
How to get more out of UltraGen
To get the most from the UltraGen tab, it helps to follow a few simple rules.
- Start with a clear task. Not "make it look nice", but something specific: remove the background, remove the keys, strengthen the detail, get a clean view of the dog from several angles.
- Do not overload the prompt. Short and concrete beats long and vague.
- Say what must be preserved. For example: the pose, the proportions, the contours, the shape of the muzzle, the lettering, the composition.
- Say what must go. The background, clutter, unwanted objects, a hand, a table, accessories, shadows, textures.
- Expect to iterate. If the result is nearly right, you usually do not need to start over — refine the request and run it again.
Why UltraGen matters specifically for 3D printing
The value of UltraGen in AIPRINTGEN is not that it "makes pictures", but that it helps you prepare the right source image for practical tasks:
- for generating a 3D model;
- for the printing that follows;
- for creating a bas-relief;
- for figurines and souvenirs;
- for working with text and decorative elements;
- for cleaning up user photos before the 3D step.
In summary
The UltraGen tab in AIPRINTGEN opens up far more than it might seem at first glance. It is not only a step before 3D generation, but a working tool in its own right for preparing references: from improving an image and removing unwanted elements to blending styles, generating bases and preparing images for bas-reliefs.
For users who arrive looking for a "3D model from a photo", "AI for 3D models", "STL from a photo" or "a model for a 3D printer", UltraGen becomes an important part of the process, because this is where the foundation of the final result is laid. The next step is creating a 3D model from your prepared photo.
Keep your expectations realistic all the same: UltraGen is a powerful, versatile tool, but not magic. Reaching the intended result may require refining the prompt, improving the reference or running the generation again.
Frequently asked questions
What can you do in UltraGen in AIPRINTGEN?
UltraGen helps you prepare 2D references for the 3D generation that follows: improving the image, removing the background, deleting unwanted elements, blending styles, preparing images for bas-reliefs and creating extra elements such as bases.
Is UltraGen suitable for preparing an image for a bas-relief?
Yes, this is one of its most valuable uses. UltraGen can make an image cleaner, more readable and more contrasted, which matters a great deal for the bas-relief that follows.
Can I remove an unwanted object from a photo?
Yes, in many cases UltraGen can delete an object you do not need: keys in a hand, accessories, background elements or visual clutter. It works best when the task is stated clearly.
Can I use UltraGen for figurines from photos?
Yes. It is handy when you need better angles, a cleaner background, fewer unwanted details and a better reference for generating the figurine afterwards.
Can UltraGen blend the styles of two images?
Yes, that scenario is supported. You can use two references and, if needed, add a prompt stating what to take from the first image and what from the second.
Why do I sometimes have to regenerate the result?
Because UltraGen, like any generator, does not always interpret the task perfectly on the first attempt. Sometimes you need to refine the prompt, swap the source image or simply run it again.
Should I ask for the background to be removed straight away?
Yes, that is good practice. If your model needs a clean background, state it while the 2D reference is still being generated.
What to do next
A prepared reference is half the work. The generation itself comes next:

How to create a 3D model from a photo with AI →

 Our community


